WshShell is a generic
name for a powerful object that enables you to query and interact with
various aspects of the Windows shell. You can display information to the
user, run applications, create shortcuts, work with the Registry, and
control Windows environment variables. The next few sections discuss
each of those useful tasks.
Referencing the WshShell Object
WshShell refers to the Shell object exposed via the automation interface of WScript. Therefore, you must use CreateObject to return this object:
Set objWshShell = WScript.CreateObject("WScript.Shell")
From here, you can use the objWshShell variable to access the object’s properties and methods.
Displaying Information to the User
You saw earlier that the WScript object’s Echo
method is useful for displaying simple text messages to the user. You
can gain more control over the displayed message by using the WshShell object’s Popup method. This method is similar to the MsgBox
function used in Visual Basic and VBA in that it enables you to control
both the dialog box title and the buttons displayed, and to determine
which of those buttons the user pressed. Here’s the syntax:
WshShell.Popup(strText [, nSecondsToWait] [, strTitle] [, intType])
| WshShell | The WshShell object. |
| strText | The message you want to display in the dialog box. You can enter a string up to 1,024 characters long. |
| nSecondsToWait | The maximum number of seconds the dialog box will be displayed. |
| strTitle | The text that appears in the dialog box title bar. If you omit this value, Windows Script Host appears in the title bar. |
| intType | A
number or constant that specifies, among other things, the command
buttons that appear in the dialog box (see the next section). The
default value is 0. |
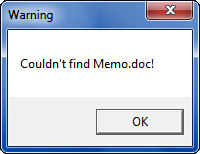
For example, the following statements display the dialog box shown in Figure 1:
Set objWshShell = WScript.CreateObject("WScript.Shell")
objWshShell.Popup "Couldn't find Memo.doc!", , "Warning"
Tip
For long messages, VBScript wraps the text inside the dialog box. If you prefer to create your own line breaks, use VBScript’s Chr function and the carriage return character (ASCII 13) between each line:
WshShell.Popup "First line" & Chr(13) & "Second line"
For JavaScript, use \n instead:
WshShell.Popup("First line" + "\n" + "Second line");
Setting the Style of the Message
The default Popup dialog box displays
only an OK button. You can include other buttons and icons in the dialog
box by using different values for the intType parameter. Table 1 lists the available options.
Table 1. Popup Method’s intType Parameter Options
| VBScript Constant | Value | Description |
|---|
| Buttons | | |
| vbOKOnly | 0 | Displays only an OK button. This is the default. |
| vbOKCancel | 1 | Displays the OK and Cancel buttons. |
| vbAbortRetryIgnore | 2 | Displays the Abort, Retry, and Ignore buttons. |
| vbYesNoCancel | 3 | Displays the Yes, No, and Cancel buttons. |
| vbYesNo | 4 | Displays the Yes and No buttons. |
| vbRetryCancel | 5 | Displays the Retry and Cancel buttons. |
| Icons | | |
| vbCritical | 16 | Displays the Critical Message icon. |
| vbQuestion | 32 | Displays the Warning Query icon. |
| vbExclamation | 48 | Displays the Warning Message icon. |
| vbInformation | 64 | Displays the Information Message icon. |
| Default Buttons | | |
| vbDefaultButton1 | 0 | The first button is the default (that is, the button selected when the user presses Enter). |
| vbDefaultButton2 | 256 | The second button is the default. |
| vbDefaultButton3 | 512 | The third button is the default. |
You derive the intType argument in one of two ways:
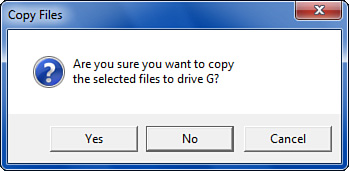
The script in Listing 1 shows an example and Figure 2 shows the resulting dialog box.
Listing 1. VBScript Example That Uses the Popup Method to Display the Dialog Box
' First, set up the message
'
strText = "Are you sure you want to copy" & Chr(13)
strText = strText & "the selected files to drive G?"
strTitle = "Copy Files"
intType = vbYesNoCancel + vbQuestion + vbDefaultButton2
'
' Now display it
'
Set objWshShell = WScript.CreateObject("WScript.Shell")
intResult = objWshShell.Popup(strText, ,strTitle, intType)
|
Here, three variables—strText, strTitle, and intType—store the values for the Popup method’s strText, strTitle, and intType arguments, respectively. In particular, the following statement derives the intType argument:
intType = vbYesNoCancel + vbQuestion + vbDefaultButton2
You also could derive the intType argument by adding up the values that these constants represent (3, 32, and 256, respectively), but the script becomes less readable that way.
Getting Return Values from the Message Dialog Box
A dialog box that
displays only an OK button is straightforward. The user either clicks OK
or presses Enter to remove the dialog from the screen. The multibutton
styles are a little different, however; the user has a choice of buttons
to select, and your script should have a way to find out which button
the user chose, which enables it to decide what to do next, based on the
user’s selection. You do this by storing the Popup method’s return value in a variable. Table 2 lists the seven possible return values.
Table 2. Popup Method’s Return Values
| VBScript Constant | Value | Button Selected |
|---|
| vbOK | 1 | OK |
| vbCancel | 2 | Cancel |
| vbAbort | 3 | Abort |
| vbRetry | 4 | Retry |
| vbIgnore | 5 | Ignore |
| vbYes | 6 | Yes |
| vbNo | 7 | No |
To process the return value, you can use an If...Then...Else or Select Case structure to test for the appropriate values. For example, the script shown earlier used a variable called intResult to store the return value of the Popup method. Listing 30.5 shows a revised version of the script that uses a VBScript Select Case statement to test for the three possible return values.
Listing 2. Script That Uses a Select Case Statement to Process the Popup Method’s Return Value
' First, set up the message
'
strText = "Are you sure you want to copy" & Chr(13)
strText = strText & "the selected files to drive A?"
strTitle = "Copy Files"
intType = vbYesNoCancel + vbQuestion + vbDefaultButton2
'
' Now display it
'
Set objWshShell = WScript.CreateObject("WScript.Shell")
intResult = objWshShell.Popup(strText, ,strTitle, intType)
'
' Process the result
'
Select Case intResult
    Case vbYes
        WScript.Echo "You clicked ""Yes""!"
    Case vbNo
        WScript.Echo "You clicked ""No""!"
    Case vbCancel
        WScript.Echo "You clicked ""Cancel""!"
End Select
|
Running Applications
When you need your script to launch another application, use the Run method:
WshShell.Run strCommand [, intWindowStyle] [, bWaitOnReturn]
| WshShell | The WshShell object. |
| strCommand | The
name of the file that starts the application. Unless the file is in the
Windows folder, you should include the drive and folder to make sure
that the script can find the file. |
| intWindowStyle | A constant or number that specifies how the application window will appear: |
| | intWindowStyle | Window Appearance |
| | 0 | Hidden |
| | 1 | Normal size with focus |
| | 2 | Minimized with focus (this is the default) |
| | 3 | Maximized with focus |
| | 4 | Normal without focus |
| | 6 | Minimized without focus |
| bWaitOnReturn | A logical value that determines whether the application runs asynchronously. If this value is True, the script halts execution until the user exits the launched application. If this value is False, the script continues running after it has launched the application. |
Here’s an example:
Set objWshShell = WScript.CreateObject("WScript.Shell")
objWshShell.Run "Control.exe Inetcpl.cpl", 1, True
This Run method launches Control Panel’s Internet Properties dialog box.